Categorization Tutorial: Difference between revisions
From JoS Wiki
Blitzkreig (talk | contribs) No edit summary |
Blitzkreig (talk | contribs) No edit summary |
||
| Line 6: | Line 6: | ||
[[File:VisualEditor category item.png|left|thumb|256x256px]] | |||
----[[File:VisualEditor category item.png|left|thumb|256x256px]] | |||
| Line 20: | Line 21: | ||
---- | |||
[[File:VisualEditor - Category editing.png|left|thumb|358x358px]] | [[File:VisualEditor - Category editing.png|left|thumb|358x358px]] | ||
| Line 35: | Line 33: | ||
---- | |||
[[File:VisualEditor - Category editing 2.png|left|thumb|353x353px]] | [[File:VisualEditor - Category editing 2.png|left|thumb|353x353px]] | ||
Additionally, categories which are assigned to a page can be removed by clicking on that category and pressing the trash can icon. | Additionally, categories which are assigned to a page can be removed by clicking on that category and pressing the trash can icon. | ||
Revision as of 16:52, 20 July 2022

Step 1) Click the 'edit' button (not 'edit source'!) to open the VisualEditor toolbar for that page.

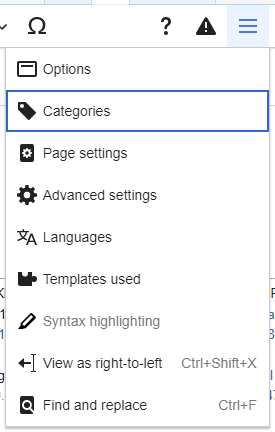
Step 2) Within the VisualEditor toolbar, click the drop-down box, located on the right side. Then, select 'categories'. This will open the page options menu, where the categories of each page can be edited.

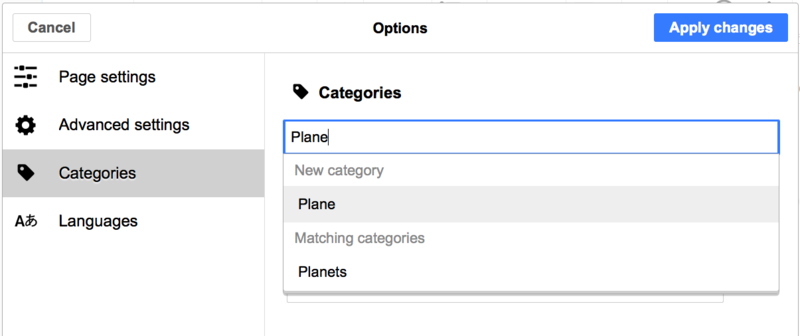
Step 3) Add a page to a category by typing in the name of the category. If a category is not yet created, you can create it automatically through this same process. When finished, click 'Apply changes'.
Note: There may be multiple categories for which a page can fall under.

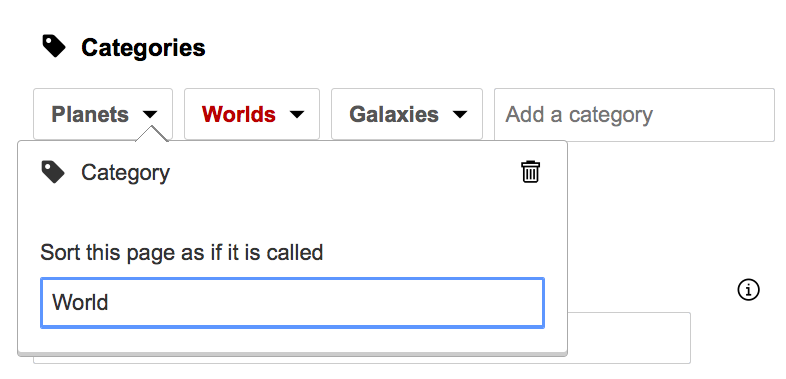
Additionally, categories which are assigned to a page can be removed by clicking on that category and pressing the trash can icon.
